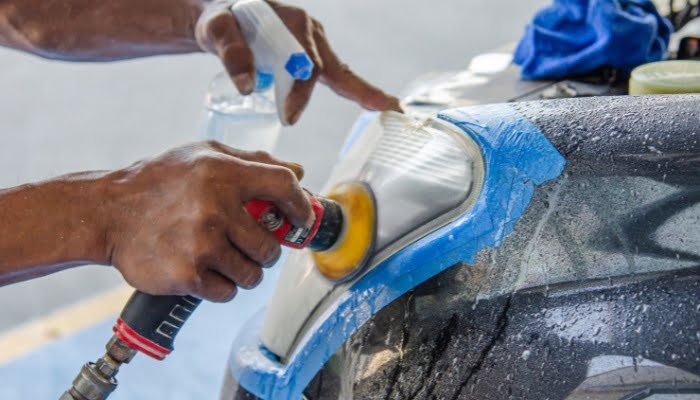
Headlights are the only hope in the dark, fog, storms, and other such situations. We all know that. That’s why many of us try to protect headlights at all costs.
Clear coating is one of the most common protection types that is used for protecting headlights from heat, sunlight, UV light, dust, and more.
However, this coating is not forever. It eventually becomes flakey, dull, and yellowish. That is more dangerous than the original dirty headlights.
That is why we need to remove clear coats and recoat them.
So how do I remove the clear coat from the headlights?
Well, that’s why we are here! In this article, we discussed every little step of removing a clear coat. So, keep reading.
How to Remove Clear Coat From Headlights
To remove the clear coat from headlights without specialized equipment, we can follow the following process:
| This blog post may contain affiliate links. If you click on these links and make a purchase, we may earn a commission at no additional cost to you. We only recommend products or services that we believe will add value to our readers. Please see our full affiliate disclosure for further information. |
Necessary Equipment
You will need some necessary equipment and items in order to remove clear coats.
- Tape for masking
- Plastic lens cleaner solution
- Water with sprayer
- Sanding machine
- Polisher
- Cotton cloth
- 400-grit sanding disk
- 600-grit sanding disk
- 1500-grit sanding disk
- 2000-grit sanding disk (if necessary)
- 3000-grit polish disk
- Microfiber towels
- UV coating solution

Let’s discuss it step by step. It will help you in understanding better.
Step 1: Masking the Light
At first, start by masking the light with tape. Masking is important; otherwise, body paint may be damaged.
Step 2: Applying the Solution
Apply the cleaner solution to the full headlight lens. It will clear all the dust and dirt on the headlight. Clean it with a cotton cloth.
Step 3: Sanding with 400-grit
Start sanding with the 400-grit sand disk. Sand softly and evenly. Spray water between the sanding to see if the scabs are removed or not. Sand until scabs become minimal.
Step 4: Sanding with 600-grit
Now start sanding with a 600-grit sand disk. Sand with light pressure. Once again, rinse the water and clean it to make sure you have sanded it evenly.
Step 5: Sanding with 1500-grit
After sanding with 600-grit for some time, continue sanding with 1500-grit sand disk. Again, rinse with water to make sure of even sanding.
This will be the last sanding. So sand until you remove all the scabs and dirt from the previous coating. Make sure you sanded evenly and finalized the sanding.
Step 6: Sanding with 2000-grit
If you think 1500 grit is not enough, then use 2000-grit sand disks a few times. Then clean the headlight with a cotton cloth. Make sure all the dust from sanding is removed.
Step 7: Polishing with 3000-grit
After sanding, start polishing with the polisher and 3000-grit polishing disk. It will bring back the clarity of the headlight.
Step 8: Applying Cleaner Solution
Now rinse with the cleaner solution once again. Clean the headlight with a microfiber towel. Remove all the masking tape.
Step 9: Applying UV Coating
Mix the UV coating properly. Then apply the solution to the headlight with a microfiber towel or high-quality paper towel. Wait a few minutes for it to dry. Use another layer if you need to.
Tada! You have successfully removed your previous clear coating. Your vehicle’s headlights should look new.
When should I remove the Clear Coating?
You might have a question that, well, you explained how to remove the clear coat, but when to remove them?
Well, the appropriate answer varies. It depends on how good your coating is, how much time your vehicle spends in rough conditions, and how much you use headlights.
Basically, when you start having issues with headlight visibility and it starts looking dull and yellow, then it will be the right time.
Remember, if you don’t remove scabs timely, you might have problems while driving at night and such other problems.
Conclusion
Don’t take risks with blurry and dim headlights. Remove the clear coating timely. Then Coat again if you need it, or you can use other protection techniques too.
Remember, scabs from a clear coat can permanently damage the lens in the long term.
So, remove the scabs in time. We have discussed how to remove clear coats from headlights very clearly. We also discussed when to remove the clear coat.
After reading this article, you should be able to remove scabs in your own garage. The process should be effortless if you follow the steps.


